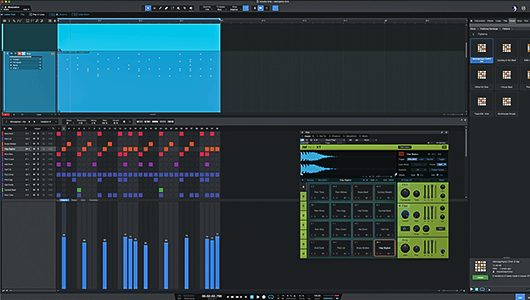
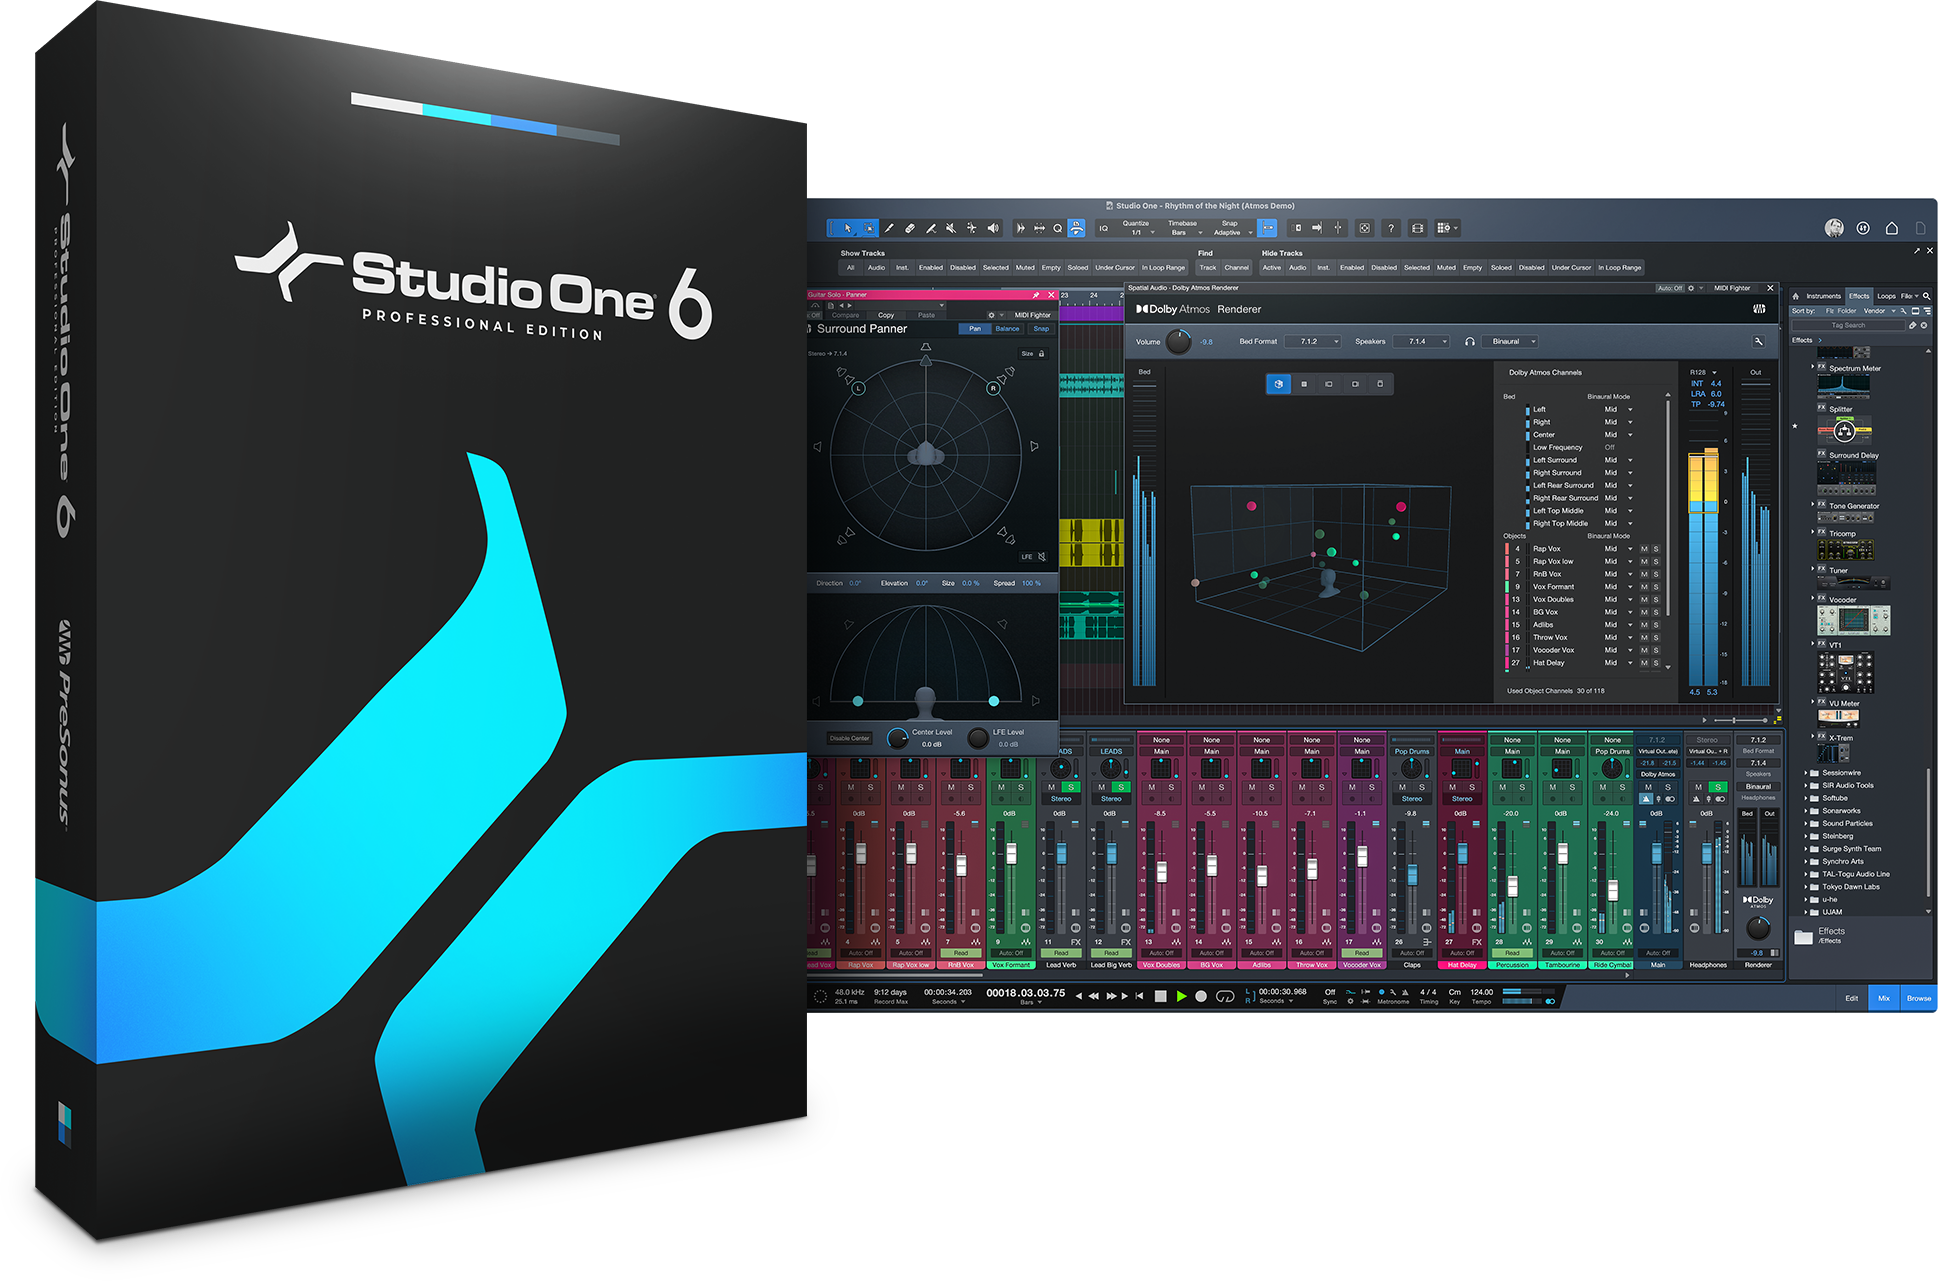
Studio One
Now with Apple Spatial Audio monitoring and distribution through TuneCore.


Record. Compose. Produce. Mix. Master. Distribute. Perform.
Studio One version 6 sets a new standard for end-to-end music creation software with enhanced drag-and-drop workflows, new quick-start Smart Templates, powerful, fully integrated immersive audio tools, and integrated direct distribution through TuneCore.
Creators
in Studio One.


Powerful
music production.
Studio One 6 adds new tools and industry-leading integrations to bring your music productions to life.

NEW
Integrated Immersive Audio Workflow
End-to-end workflow purpose-built for immersive audio. Record with multichannel microphones, mix with enhanced plug-ins, and export files in a variety of formats.

Chord Track
From pop ballads to rap anthems, the Chord Track lets you experiment with new chord progressions until your next hit song comes to life – no music theory degree required.

NEW
Lyrics Track
Add Lyrics to your audio or MIDI production and use words to navigate your session.

NEW
Apple Spatial Audio Monitoring
Hear how your Dolby Atmos mixes will sound on Apple Music without leaving Studio One or using other software. Experience head-tracking and personalized monitoring with AirPods Pro and AirPods Max.

Built-in beat maker
Make beats fast in Studio One with integrated pattern editing and live looping.

Lightning-fast comping
Studio One makes assembling the perfect vocal-take simple and efficient.
User-friendly
drag-and-drop.
Whether you’re a seasoned pro or recording beginner, new enhancements to Studio One’s pioneering drag-and-drop workflow make every creator’s process faster and easier.
Drag in audio and effects
Drag in effects plug-ins, audio files, loops, and sound samples directly from the browser pane. Studio One then automatically creates the tracks for you.
Copy FX chains
Drag and drop any insert from one channel to another.

Extract chords and maps
Any source can become a source of inspiration with a quick drag and drop.

Integrated Studio One+ Collaboration
Upload and download files to and from your Studio One+ Workspaces with drag-and-drop.

Sound replacement
Replace drum sounds with samples simply by dragging the source track to an Impact XT track.
Blazingly fast
workflows.
Decades of software engineering set Studio One's unique features apart, with each feature intuitively combining to create seriously efficient and flexible workflows.

Arranger Track
Rearrange or preview a new song structure with a simple drag and drop.

Scratch Pads
Test out remix ideas or just capture a synth riff without affecting your arrangement or creating a new session.

Advanced Melodyne Integration
Time- and pitch-correcting audio made quick and easy with Celemony Melodyne Essentials included.
Patterns
Patterns reinvent step sequencing. Effortlessly create drums, basslines, and synth leads using variable sequence lengths, unlimited variations, and more.

Harmonic Editing
Only Studio One features harmonic editing for both audio and MIDI.

Multitrack Tools
Quickly edit multitrack drums thanks to advanced transient detection, slicing, and time-stretching.
Start with
Smart Templates.
Quick-start essential workflows for immersive audio, recording, mixing, mastering, beat production, or simply playing a virtual instrument – all with a single click.
Mixing in surround?
Start immersive audio projects fast with the Mix in Surround Smart Template and Dolby Atmos tutorial.

Mixing stereo audio?
Open a Smart Template with your favorite channel strips loaded and a drop zone to quickly load stems.

Just getting started?
Each template provides a step-by-step tutorial to guide you through your first production.

Making a beat?
Load a Smart Template with Pattern editing already open and only the features you need visible.
Creating content?
Fast-track creating, recording, and mixing your next podcast episode, with or without video.
Ready to master and release?
Take your project or production through mastering, publishing, and release with ease.
30+ Native Effects included.
Supercharge your mixing and get inspired for your productions with Studio One’s core library of included effects plug-ins – all entirely updated to support immersive audio mixing and Dolby Atmos.

Ampire
Featuring five State-Space models of classic guitar and bass amps with unparalleled realism. 13 stompboxes and 16 classic cabinets are also included to build the ultimate guitar rig.
NEW
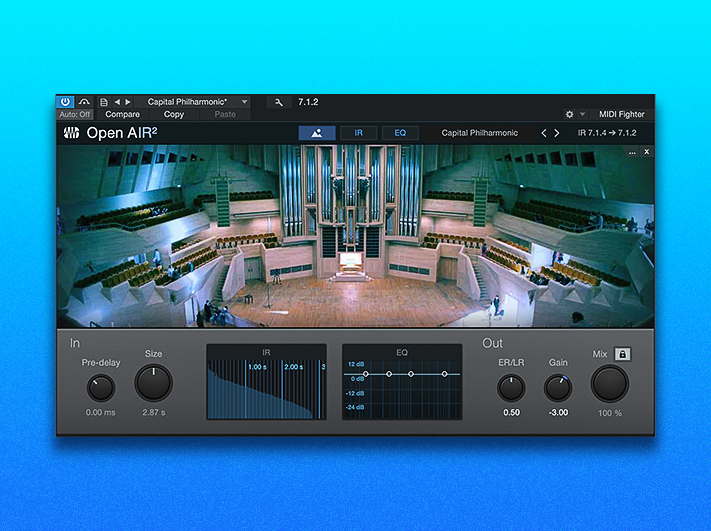
OpenAIR2
With its new look and feel and a brand-new library of true 7.1.4 impulse responses (HDIRs), OpenAIR2 convolution reverb creates authentically immersive 3D spaces.
NEW
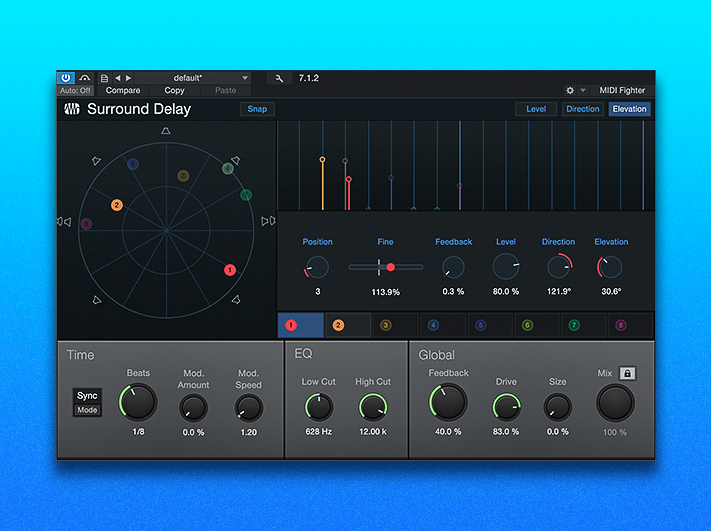
Multi-Tap Surround Delay
All-new eight-tap delay plug-in with individual surround panners. Delay taps can be synchronized to the song tempo for exciting dimensional and rhythmic effects.
NEW
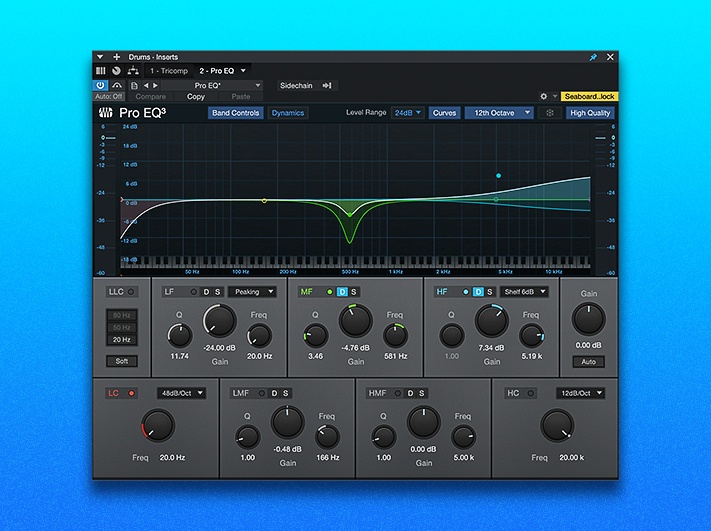
ProEQ3
Even-band parametric equalizer for precise, granular sound control. Phase-linear low-cut, variable high-cut, low-frequency, and high-frequency multimode filters included, plus solo and dynamics on every band.

Analog Delay
Create deteriorating echoes; modulate delay and pitch; and create retro flanging and chorus effects with this classic analog bucket-brigade delay to add vintage character to your sound!
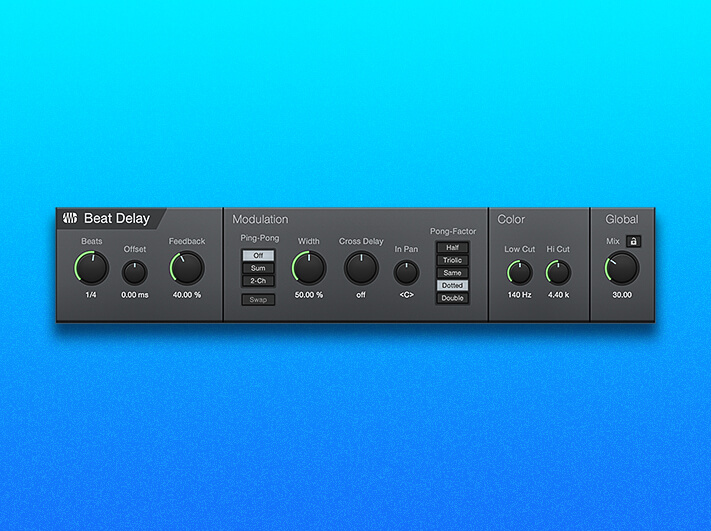
Beat Delay
Create pulsating patterns and complex polyrhythms with this a tempo-synced delay plug-in with optional cross-delay and filtered feedback.

Binaural Pan
This panning effect employs phase-manipulation to alter the perceived width of stereo signals, from mono to double the normal width. Check for mono compatibility using the Mono switch.

Bitcrusher
Perfect for audio abuse, Bitcrusher combines overdrive, bit-depth reduction, downsampling, and clipping to create a wide variety of tonal options to distort and warp your sound.

Channel Strip
Four powerful processors in one. You get a low-cut filter, compressor, expander, and three-band parametric EQ in single plug-in instance.

Fat Channel XT
The ultimate channel strip for any input or bus, with a variable high-pass filter, gate/expander, compressor, EQ, and limiter. Get classic StudioLive compressor and EQ modules plus State-Space Modeled compressors and EQs re-created from vintage gear.

Chorder
This intelligent chord generator lets you trigger chords by playing single notes. You can set chord intervals manually or capture chord shapes played on the keyboard.
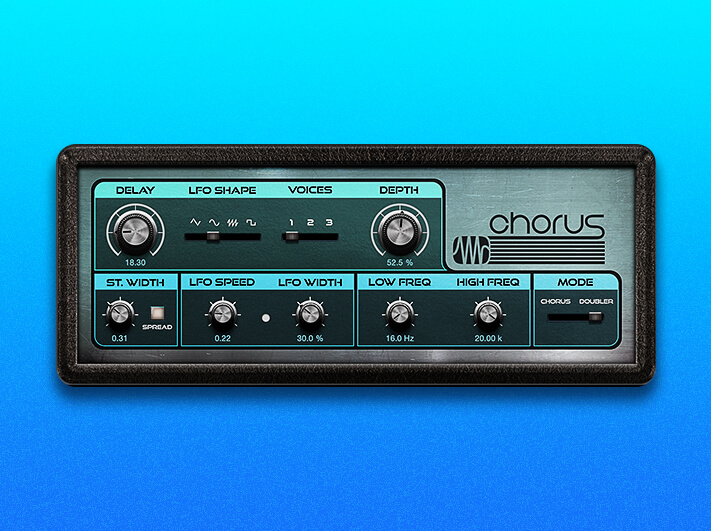
Chorus
Thicken guitar, vocal, or synth parts with lush, modulating textures. Choose one-, two-, or three-voice chorus processing and set an optional LFO delay time modulation, as well as a Stereo Width control.

Compressor
This full-featured, RMS-based compressor features easy to use sidechain options utilizing an external signal to control the compressor behavior

Console Shaper
Utilizing state-of-the-art State Space Modeling technology, this Mix Engine effect processes every channel on the bus insert independently, to capture the character of legendary analog consoles.

De-Esser
This full-featured dynamics processor used to selectively reduce the sibilance (S-sounds) of recordings by selectively compressing only the problematic frequencies.

Easy Sidechain Routing
Every native dynamics plug-in has easy sidechain routing to get the sound you want without routing headaches. Sidechain routing can be controlled both to and from a plug-in with one click.

Expander
This fully variable downward or upward expander with range control and a sidechain reduces the levels of unwanted noise or bleed from other sources in the desired signal or restores dynamic range to a compressed signal.

Flanger
Perfect for use on guitar tracks to create interesting shifts in timbre and tone, Flanger creates spatial depths, swirls, timbral shifts, and percussive effects.

Gate
This noise-gate processor features sidechain capability with a sidechain filter that includes variable low cut and high cut. Use Gate to eliminate unwanted noise or low levels—or sidechain it to your favorite virtual instrument and let Gate create a new rhythm for you.

Groove Delay
Create everything from rhythmic echoes to out-of-control repeating pitch shifts with Groove Delay. This four-tap, tempo-synced delay offers variable filters and an independent beat grid.

Input Filter
Input Filter lets you filter out unwanted notes before they reach your instrument or MIDI device. Specify a range of allowed note pitches and velocities; to filter out any note outside either range.

Level Meter
Throw Level Meter on your main bus, and you’ll always have an eye on your mix.. Choose from Peak/RMS, K-20, K-14, and K-12 modes; set RMS and Hold Length; engage to display phase correlation; even display True Peak metering.

Limiter2
This brickwall limiting processor features optional K-System Metering, three attack speeds, and two different modes to control distortion.

Mixtool
Mixtool provides common track utilities to correct for phase cancellation and correlation issues as well as adding volume trim options anywhere in the signal chain and independent from the main channel fader.

MixVerb®
A simple and efficient reverb designed to be used as an insert on mono or stereo tracks. Use it to add just the right amount of atmosphere to any signal.

Multiband Dynamics
This compressor/expander features five completely independent bands. Use it to reduce unwanted signals or banded noise and to emphasize or limit certain instruments.

Phase Meter
This utility plug-in makes it easy to check stereo playback issues and mono compatibility using a large goniometer and a phase correlation meter.

Phaser
The unmistakable rising and falling effect of a phaser may have been popularized by guitarists of the 1970s but it sounds good on nearly anything: synths, drum overheads, and even vocals.

Pipeline XT
This Studio One exclusive makes using analog processors as easy as adding a plug-in. Pipeline XT manages the signal flow to and from the external processor and can measure and compensate for latency automatically.

Redlight Dist™
Run your audio through up to three stages of tubes, transistor, op-amps, and fuzz to add just a little noise or pure distorted delight. An internal filter provides even more control over the distortion color, from rich and fuzzy to ear-piercing noise.

Arpeggiator
Create repeating patterns of notes that travel upward in pitch, downward, up-and-down, down-and-up, or in a randomized pattern.

Autofilter
Create complex, tempo-synced, rhythmic filter patterns and lush filter sweeps. The State Space Modeled Drive stage lets you add natural analog saturation for vintage character.

Pedalboard
Use Ampire’s collection of 13 stompboxes without the amps, and easily drag and drop stompbox settings between Ampire and Pedalboard.
Virtual Instruments.
Ignite your imagination with included and add-on virtual instruments plus hundreds of audio samples and loops. You can also combine multiple virtual instruments to design your own unique sound.
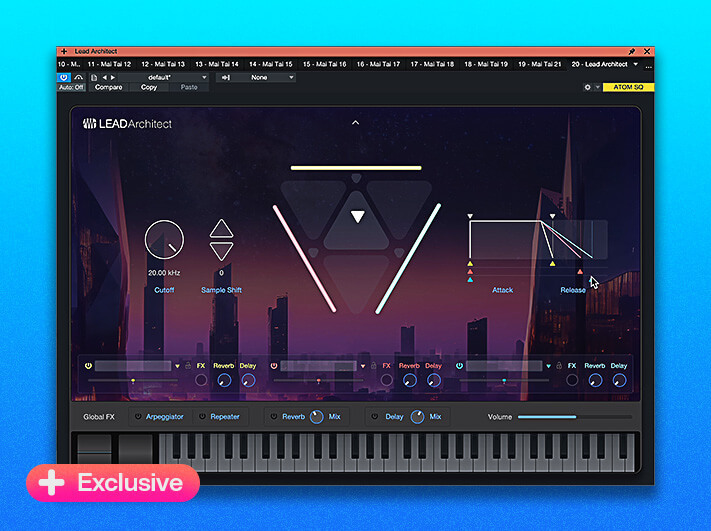
Lead Architect
New for version 6.6, and available exclusively as a Studio One+ add-on, Lead Architect combines post-processed synthesis and sampling, integrated audio and effects, and an intuitive new user interface to generate powerful leads and sizzling solo sounds for hybrid melodic sequencing.

Impact XT
Create beats faster than ever with our comprehensive rhythm production environment.

Mai Tai
This polyphonic analog modeling synthesizer produces sounds that can change character, with drastic morphing changes and unique timbres.

Presence XT
From real-world to really wild, Presence XT is loaded with deeply-sampled instruments.

Presence XT Add-ons
Deep Flight One, Studio Grand, and PreSonus Symphonic Orchestra add-ons expand your Presence XT library – access all three and more with any Studio One+ plan.

Sample One XT
Build your own sampled instrument with Sample One XT’s intuitive interface.
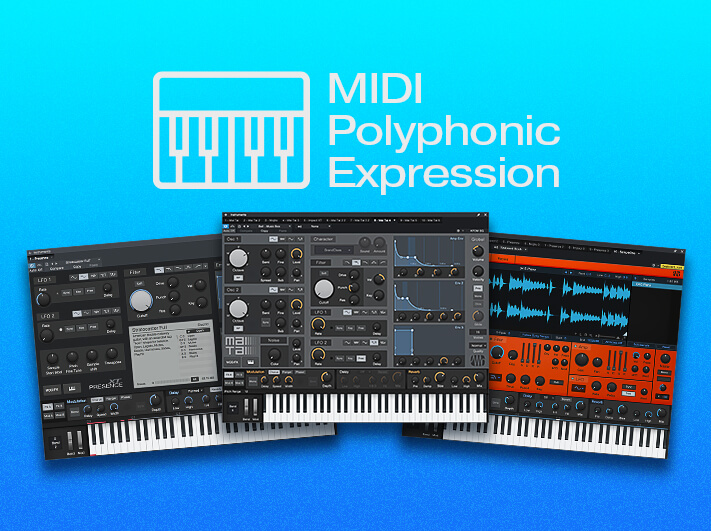
MPE Support
Sample One XT, Presence XT, and Mai Tai all now support MPE MIDI controllers.

Mojito
From buzzing bass lines to funky leads, this monophonic, subtractive synth with built-in effects delivers a wide range of tones.
Modern composition tools.
Studio One includes advanced notation features from our award-winning Notion® notation software to deliver an unmatched combination of traditional scoring and modern sequencing.

Traditional, drum, and tablature notation.
Edit your music in three notation formats and print Scores directly from Studio One.

Musical Symbol Support
Trigger Sound Variations by simply placing their musical symbols onto the Score View. Sound Variations make it easy to manage and control articulations in complex virtual instruments and orchestral libraries.

Multiple Note Views
Switch between Score View, Drum View, and Piano View—or look at the same note data in different Views all at the same time.
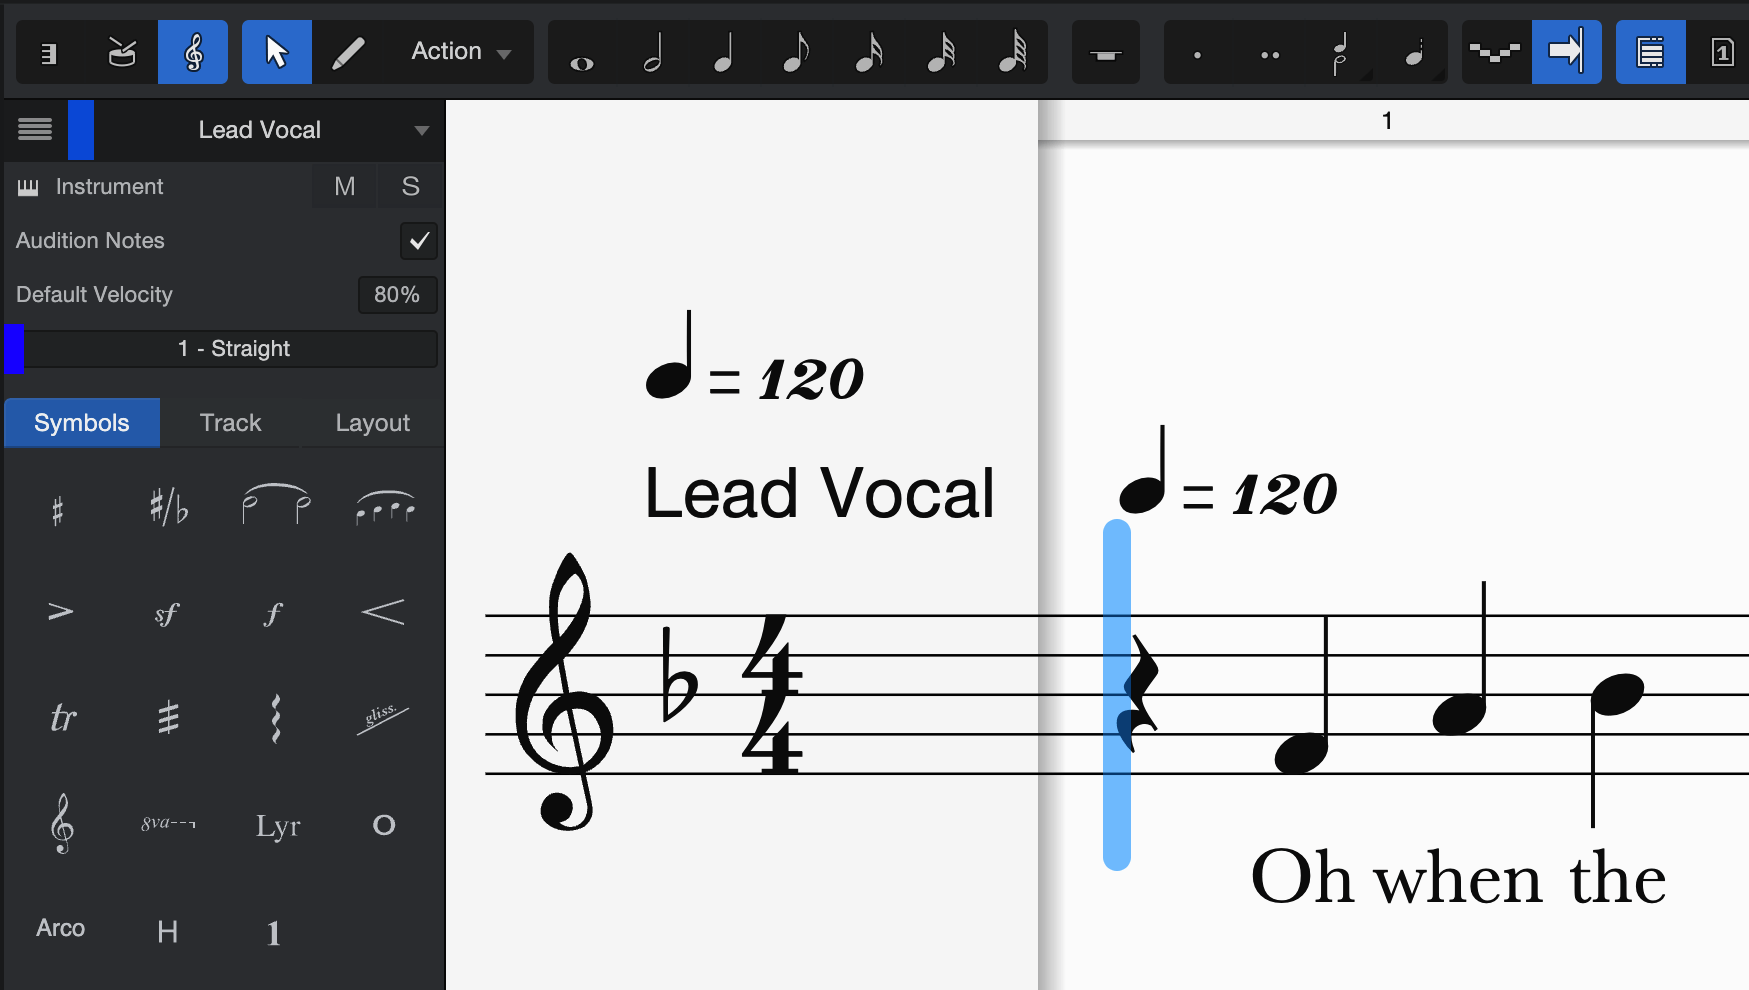
Add words to music
Assign whole words or syllables to music or directly to notes with Lyrics Track.
Integrated Mastering.
Only Studio One links Songs with Mastering Projects, so you can update mixes as needed without losing Fades, Clip Gain edits, or any other mastering work.

Professional sound
Use Studio One Native Effects and third-party plug-ins or external hardware processors to create a professional sound.
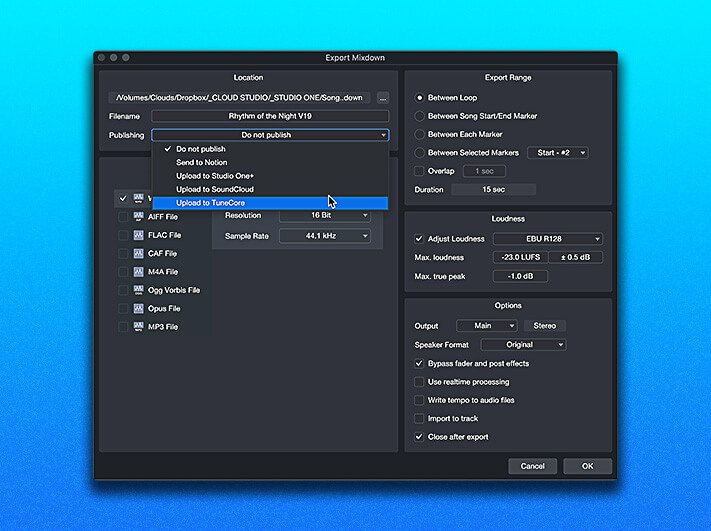
Easy upload, now with TuneCore
Upload mixed songs and mastered albums directly to SoundCloud, Studio One+, and now TuneCore for distribution on social and all major streaming platforms – a game changer for independent artists.

Export multiple formats
Export mastered files in multiple formats with one click — create MP3, WAV, FLAC, DDP, and more in a single time-saving operation.

Target loudness options
Choose from several Target Loudness options to automatically adjust your digital releases for Apple Music, YouTube, Spotify, and many more.

Ultra-high sample rate
Studio One supports sample rates up to 786 kHz for recording and playback. Compatible interface required.

Listen Bus
Use calibration plug-ins to tune your studio monitors to your room without affecting your main mix using the Listen Bus; you’ll never accidentally bounce a master with your calibration plug-in engaged again.
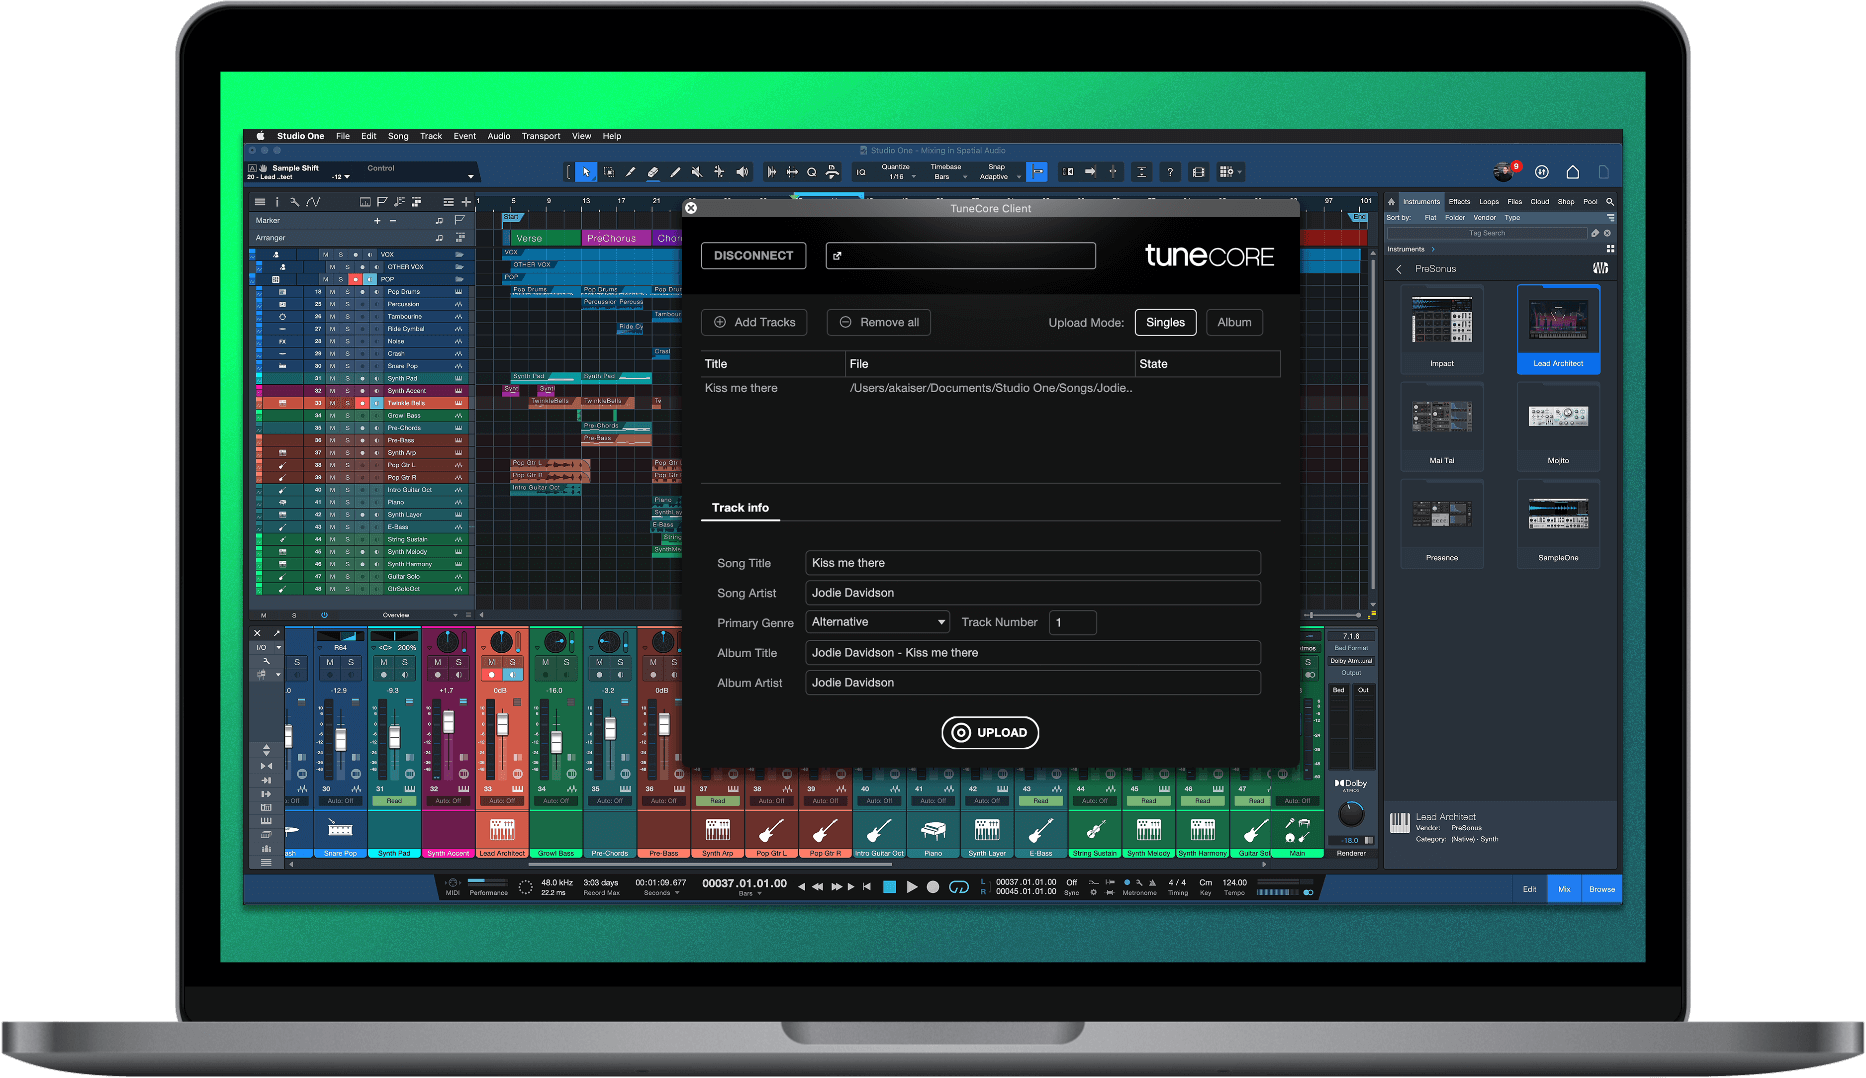
Direct distribution with TuneCore.
Upload your music directly to TuneCore without leaving Studio One through an in-app integration that connects directly to your TuneCore account. And for a limited time, all Studio One+ subscribers can get 50% off select TuneCore plans.

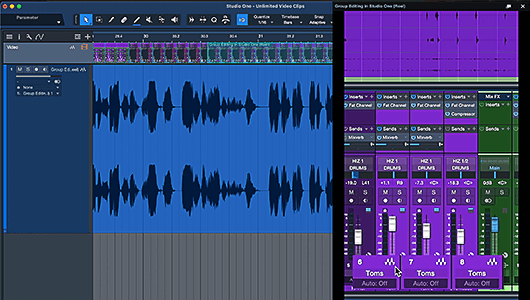
Video now on track.
Video track makes adding audio to video easy with video editing essentials now directly in Studio One.

Unlimited clips
Work on multiple reels of a feature film or an entire YouTube video in one session, with no limit on the number of video clips. Set the correct offset just by dragging the clip to the desired time position.
Embedded audio
Embedded audio can be processed in its own dedicated sub-track or edited separately.

Drag-and-drop video editing
Trim, cut, copy, paste, slip, time and edit locks, ripple edit, duplicate, and replace video all in Studio One.

Multiple export formats
Export in Quicktime, MPEG-4, or M4V with all the same audio export flexibility Studio One provides.
Customizable UI.
View only the tools, browser options, and track settings you need and save your customizations for instant recall with the new Customization Editor.
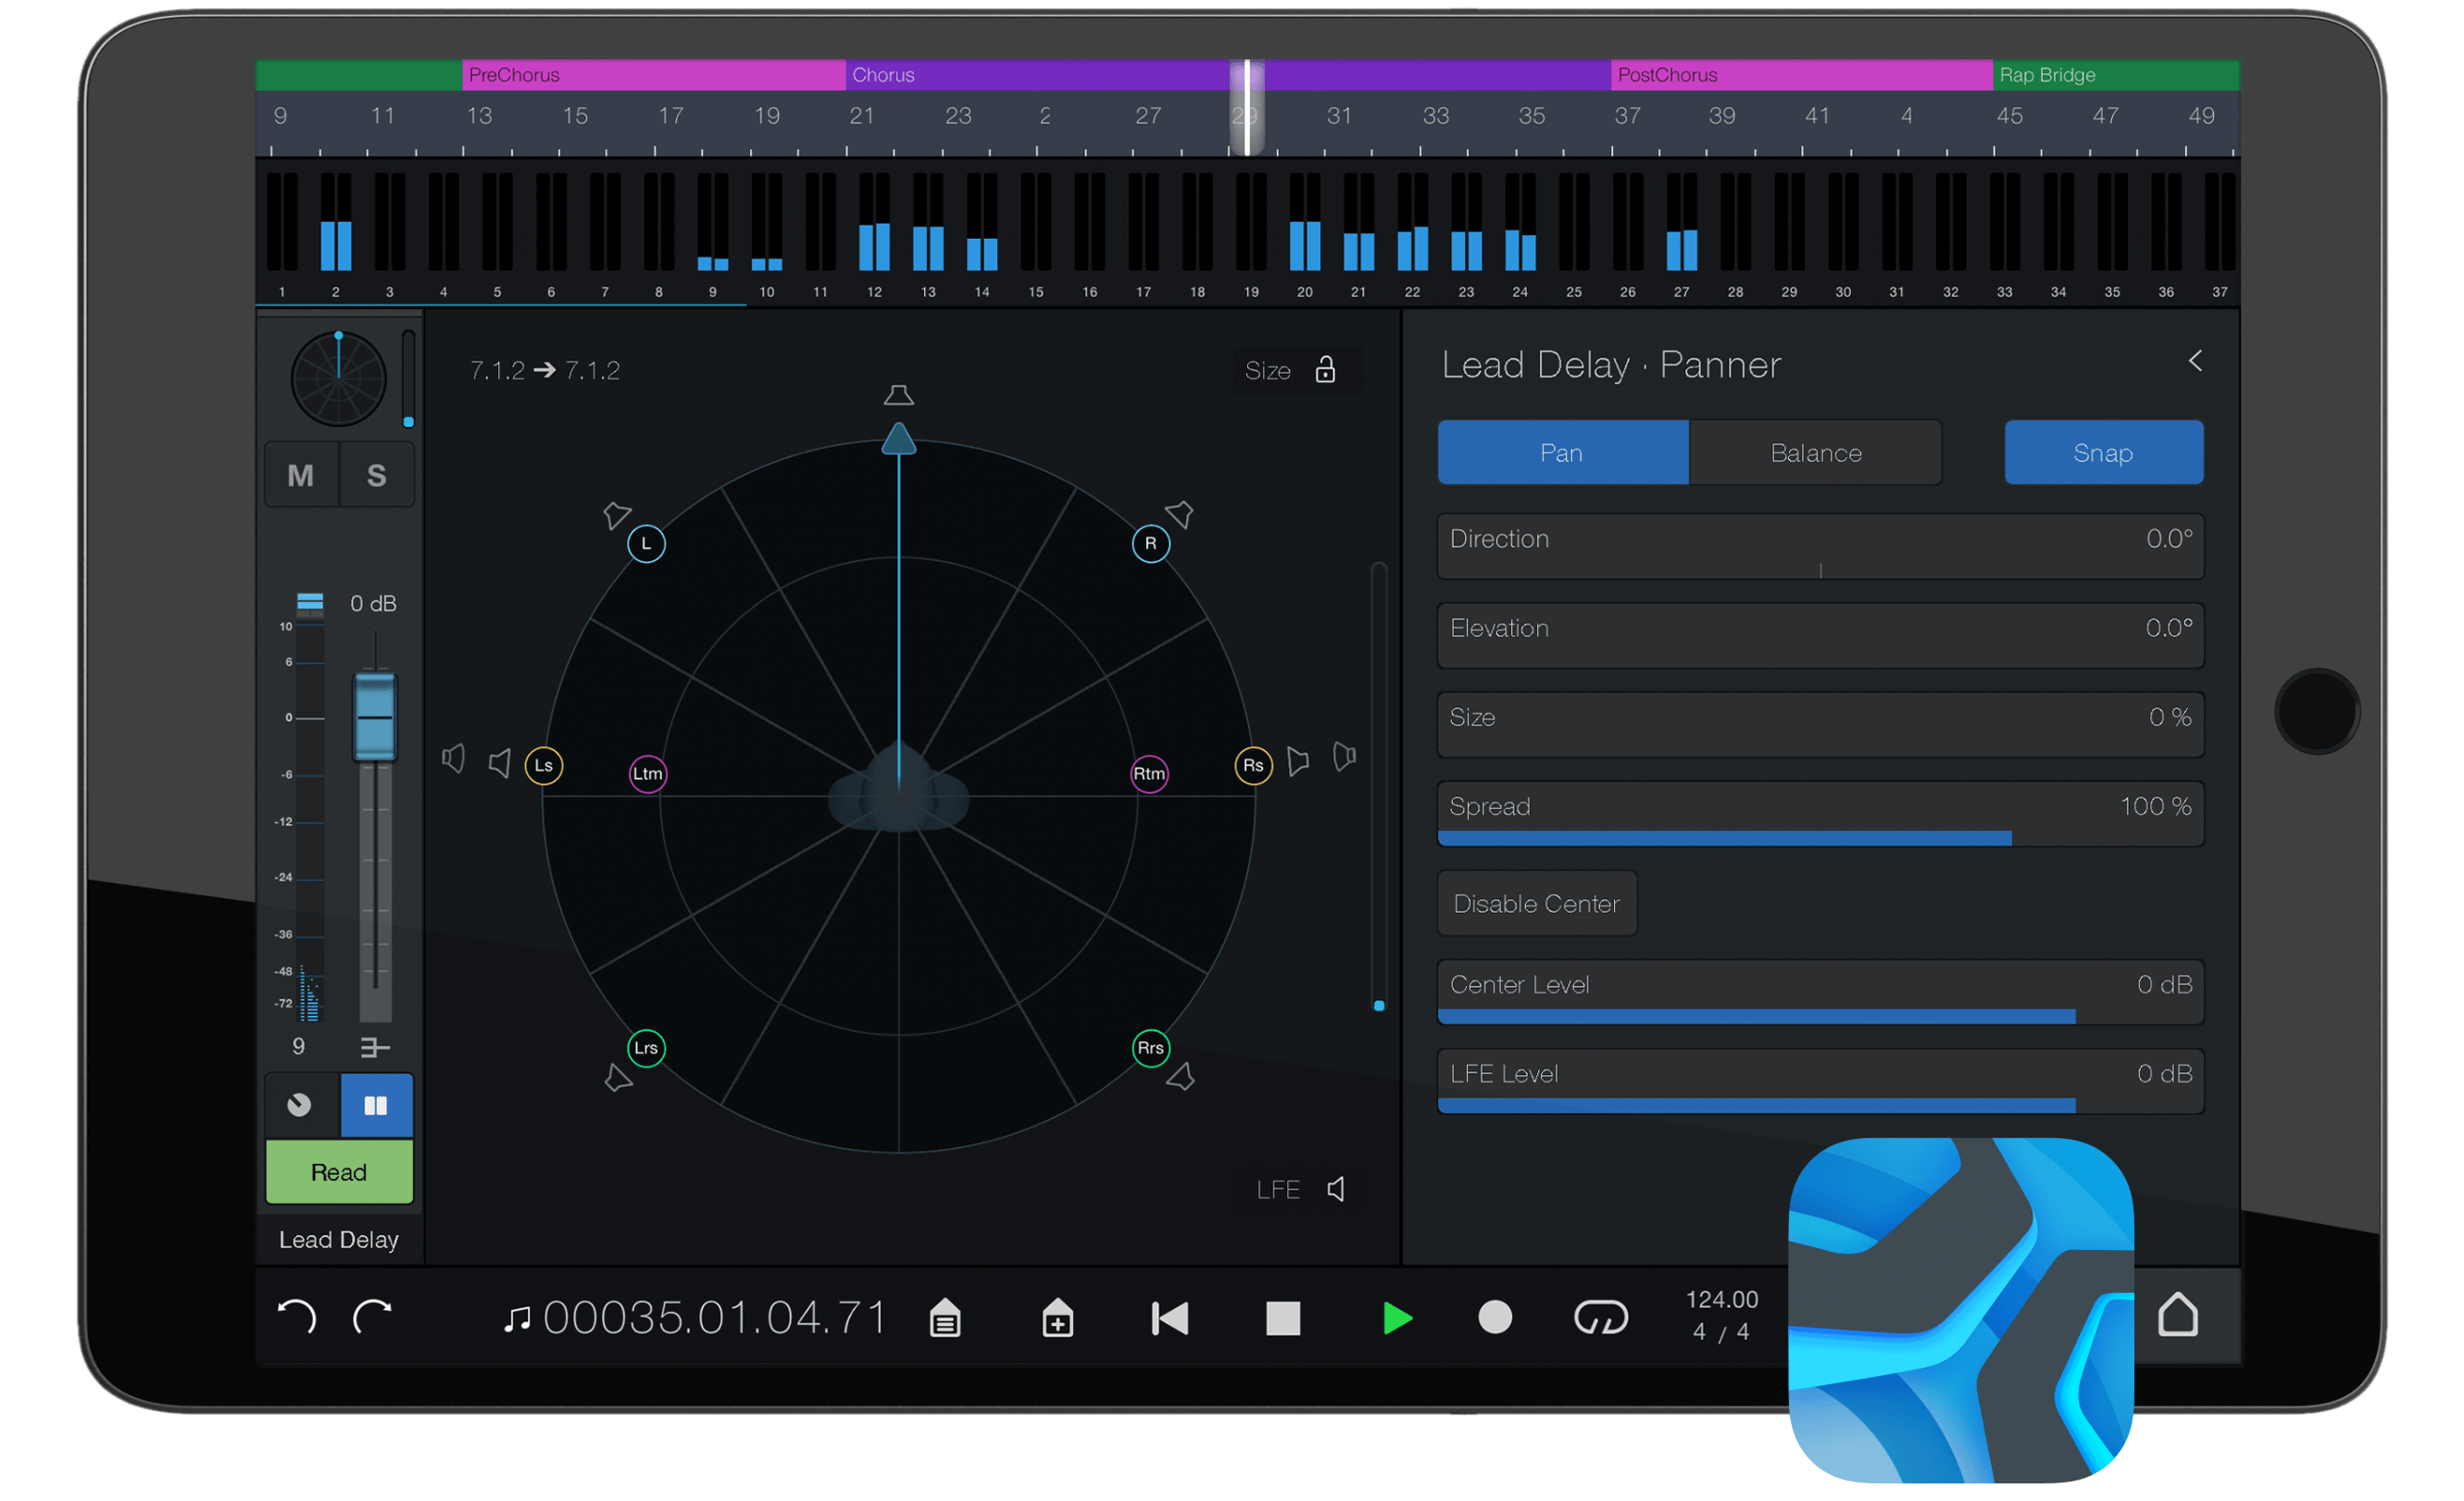
Studio One Remote.
Available free from Google Play or Apple App Store.
Studio One Remote acts as a second screen for Studio One and provides touch control for key functions including touch-enabled surround mixing and 3D panning. Write pan automation, arm tracks for recording remotely, enable clicks, punch-in, or control plug-ins — all from your tablet.


Studio > Stage.

Perform with Setlists.
Design a complete live performance using songs you create in Studio One. Easily incorporate live instruments, pre-recorded backing tracks, and virtual instruments.

Keep the Show going.
Change or update your performance in real-time with the Arranger Track. Loop sections on the fly, jump to a different part, and automatically change patches — all without missing a beat.

Performance View. Focused Control.
Navigate Setlists, control loops, playback backing tracks, and manage virtual and real instruments all in one Show window or from Studio One Remote.
The Reviews.
One of the main focuses of this release is to create a more personalized experience… I’ve been impressed with the live performance features…. This one piece of software can support you throughout the various phases of your project.
Kyle Mathias
Audio University
Studio One remains one of the most successful software applications on the market in terms of ergonomics and for this reason, we strongly recommend it to those who want an all-terrain, complete software.
Los Teignos
Audiofanzine
With more rounded video support, new sounds, tangibly improved mixer functionality, and friendlier Smart Templates for new users to name only a few, for me Studio One 6 is a HIT.
Luke Goddard
Production Expert
Studio One 6 does a great job of putting all the software tools a songwriter could need in one place…. I’m sold on trying to make Studio One 6 my go-to DAW. It’s the only one I’ve worked with that puts it all together and allows me to tailor the software.
Andy McDonough
American Songwriter, September 2022
Fuller, fatter and more versatile than the majority of DAWs out there, version 6 takes Studio One to the next level, and ably re-configures itself to suit your needs.
Andy Price
MusicRadar, October 2022
Studio One 6.0 has become a complete DAW package with that new video track ticking the final box. And Studio One+ gives you full access to it all at a minimum of cost. Like I said, it’s a no-brainer.
David Hague
Australian Videocamera, November 2022
Functions such as the global video track or the text integration have really been thought through to the end and implemented excellently. The track presets are also a great feature.
Tobias Homburger
Delamar, September 2022
This [Customization Editor] not only ensures a better workflow for power users, but also makes it easier for beginners to use the DAW…. The new track presets make the creative workflow even easier.

Jan Wilking
Beat, November 2022
Ready to create?


All prices shown are reflected in U.S. dollars ($USD). Regional pricing will vary. All amounts shown are subject to applicable local taxes.